
Project overview
In this series of posts, I will go through all the steps required to use a Raspberry Pi along with Python and Django to control the GPIO pins for an automation project.
Part 1 – The introduction, what I hope to achieve and what you will need.
Part 2 (this one) – I will start right at the beginning with getting Raspbian installed and running, then moving onto the basic configuration of the Raspberry Pi.
Part 3 – Then we’ll move onto making sure we have Python and the required modules installed and do some basic tests to make sure we are happy Python is running and we can use the GPIO pins.
Part 4 – Now it will get interesting, we’ll install the Django module for Python, and then create our project and our app (it will make sense later), we’ll also have a quick look at our database options. Once we have this, we’ll create our backend objects so we can easily add/remove our GPIO pins as we please, all managed through the admin side of Django!
Part 5 – So we have our backend, now we’ll create our front end (warning – I’m not a front end master – design/graphics will be at a minimum!). This will allow us to turn our pins on and off – we’ll test it locally.
Part 6 – So we have everything sorted, all done, we can navigate to it on our internal network… well yes, but we shouldn’t be using the development server to run it full time. In this part we’ll look at using Gunicorn as our webserver.#
Part 7 – Great, we have Gunicorn serving our site, but we still shouldn’t expose this to the word, in step Nginx, this will sit between the outside and our Gunicorn server.
So all in all quite a few steps, this is all based on what I have learnt while trying to get everything working. I hope you enjoy reading.
My disclaimer!
Before I go any further I should state that I am by no means a Linux, Python or Django expert, nor am I used to Nginx and Gunicorn for serving it up. There will no doubt be errors along the way, along with ways of doing things that aren’t best practice. This is very much intended as an internal network project so security will be minimal. I will also point out that my project will be switching mains power, you do this as your own risk, if you are not comfortable wiring mains just don’t do it, get an electrician.
Getting the Raspberry Pi ready
So this is where our fun really starts. First we need to download Raspbain, extract it onto the Micro SD Card and do a little configuration. I want it headless, which basically means for this series of posts I won’t need to connect and keyboard, mouse or monitor – everything will be done via SSH.
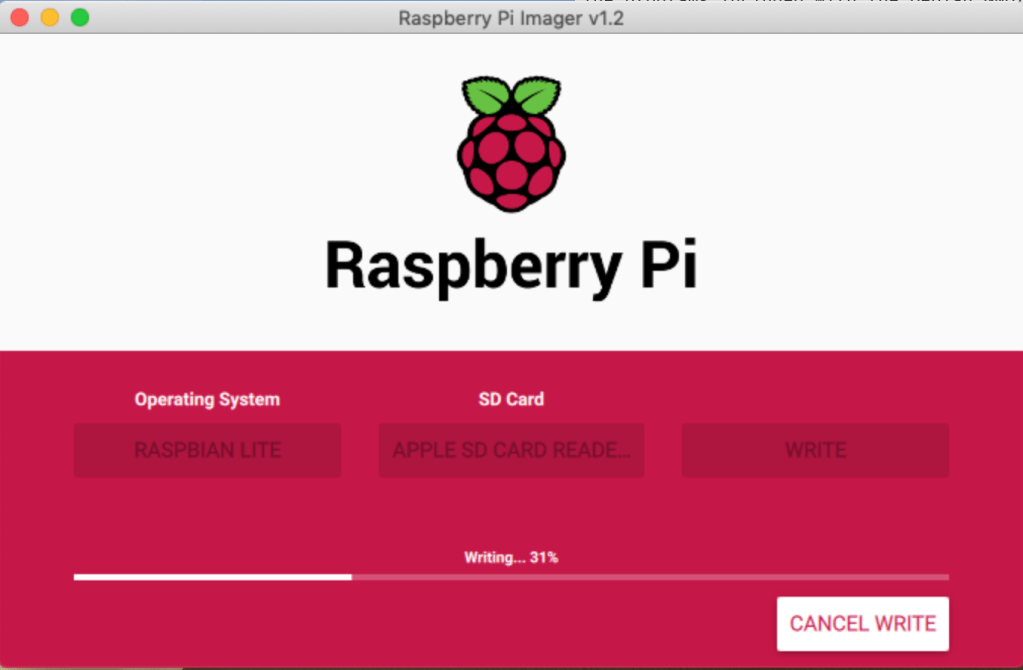
So firstly to download Raspbian, head over to https://www.raspberrypi.org/downloads/, we need to get the appropiate imager for the OS we’ll be using to do the setup, in my case I am going to download the Imager for macOS.
Once downloaded open it, firstly we choose the OS, which you choose is ultimately your choice, for this we are going to choose Raspbain (Other), then the Lite option – we don’t need the Desktop for this, plus its the smallest download size. Now select your SD Card, then click Write. Sit back while it does the work for you 🙂
Ok, so once that has done, reinsert the SD Card and it should mount/show a drive called boot. This is what we want.
So we need to setup the following before we even boot.
- SSH Connectivity
- Wi-Fi Connection
- Static IP address
- Pi Password
By default, since 2016 I think, SSH has been disabled by default on Raspbian. As we need this enabled to connect, that will be our first change.
With your SD card plugged into your computed, navigate to the boot partition or volume. On Windows this should show up as a drive, I’m using a Mac, so I need to go to /Volumes/boot.
In here, to enable SSH at boot, we simply need to create a file called SSH, that’s it! So on my Mac, in the boot directory I simply run:
touch SSH
That’s SSH enabled.
Next, Wi-Fi. Now I’m assuming you are using Wi-Fi, if you are using a cabled connection you can skip this part.
Again, this has been made easy, we need to create another file in the boot folder, this time called wpa_supplicant.conf.
Unlike last time we now need to edit this file and put the following content in it, replacing the placeholders with your Wi-Fi details:
network={
 ssid="<Name of your wireless LAN>"
 psk="<Password for your wireless LAN>"
}
Okay, so thats our Wi-Fi setup, now I like to use a static IP address on my network.
Now there are 2 ways you can do this, if you have linux/mac it is possible to mount and see the entire Raspbain system, edit the file you need and it’s done. However, its a little more involved and beyond what I want to cover here, so we are going to do it the easy way.
Remove the SD card, place it in your Raspberry Pi – make sure the monitor and keyboard are plugged in, turn it on 🙂
Once booted, enter the default user pi and the password raspberry. You should now be logged in.
From the prompt type:
sudo nano /etc/dhcpd.conf
Go to the bottom, for a Wi-Fi connection type:
wlan0 interface
static ip_address = 192.168.1.100 / 24
static routers = 192.168.1.1
static domain_name_servers = 192.168.1.1
If you are using a cabled connection, type:
eth0
static ip_address = 192.168.1.100 / 24
static routers = 192.168.1.1
static domain_name_servers = 192.168.1.1
You’ll notice the only difference if the first line, this defines the cable connection or Wi-Fi connection. Adjust the IP address and subnet to suit what your network needs.
Reboot the Raspberry Pi… Once restarted and logged in type:
ifconfig
This will show your current IP address, it should match what you had in your above file now.
Excellent, good progress. Lastly for this part we need to change our user password, to do this simply type the below and follow the prompts:
passwd
Okay, you’ve now changed your default password for the pi user. Shutdown the Raspberry Pi. You can now disconnect the monitor and keyboard if you want, we can do the rest remotely – or you can leave it connected and do it on the Raspberry Pi if you prefer.
Well that’s if for part 2, in the next part things start to get interesting..
Bye.